¶ 3. Layers
¶ 3.1 CREATION OF A LAYER
Layers allow to create views from which you can create statistics, reports and dashboards.
All the fields placed in a layer will be available, but only them.
A layer contains:
- table fields from the database
- fields associated with functions (account, year, etc.) used to calculate or extract strings
- folders that allow you to group the fields
- SQL reports from the 'Reports' module of Koha
The links between the different tables of the layer are made by the layer creator.
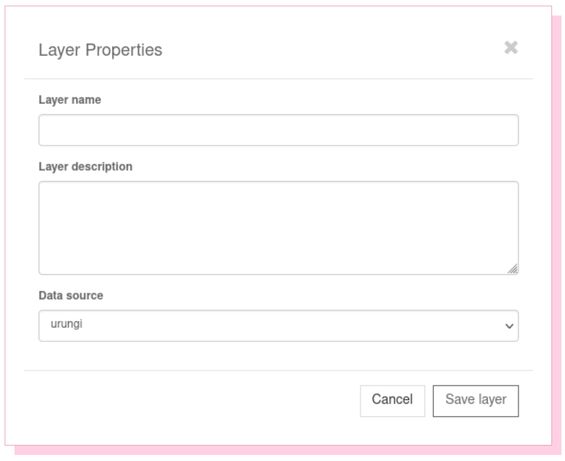
When creating a layer, you must immediately enter the name and description of the layer. This can be modified later.
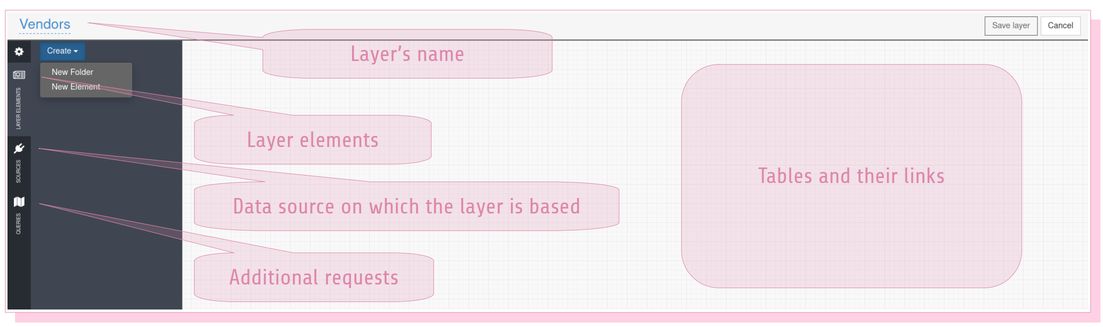
The layer is then displayed according to the following screen:
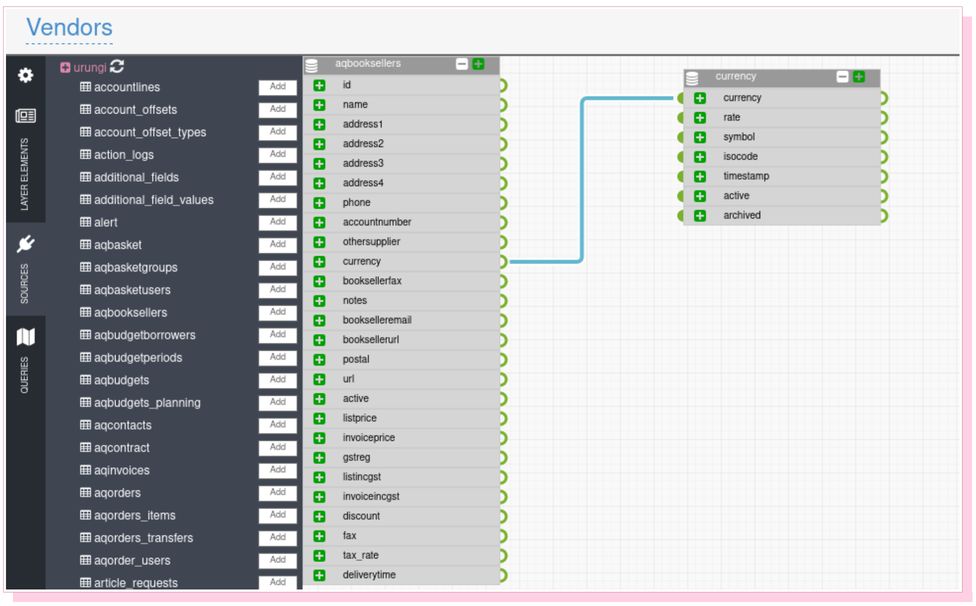
Click on ‘Source’ to select the data source on which the layer will be based, then on the name of the source you wish to use. The list of tables in the database will be retrieved and displayed:
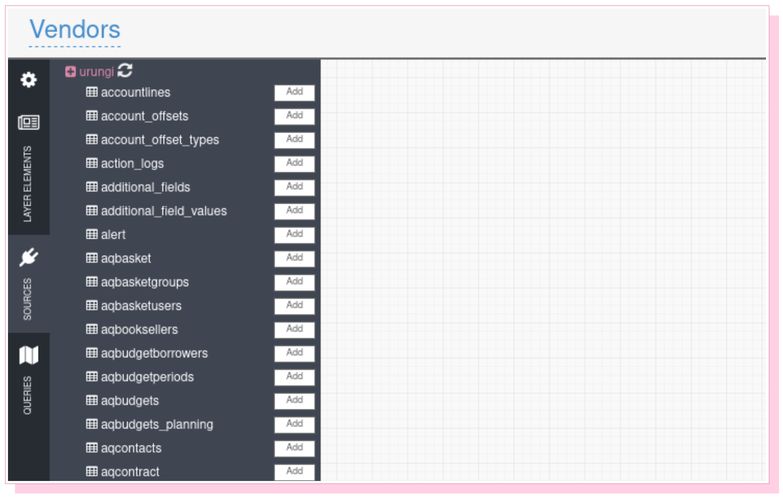
Click ‘Add’ to put the tables you want in the layer space.
Attention: the tables are systematically placed at the top left, one on top of the other. You must arrange them as you wish:
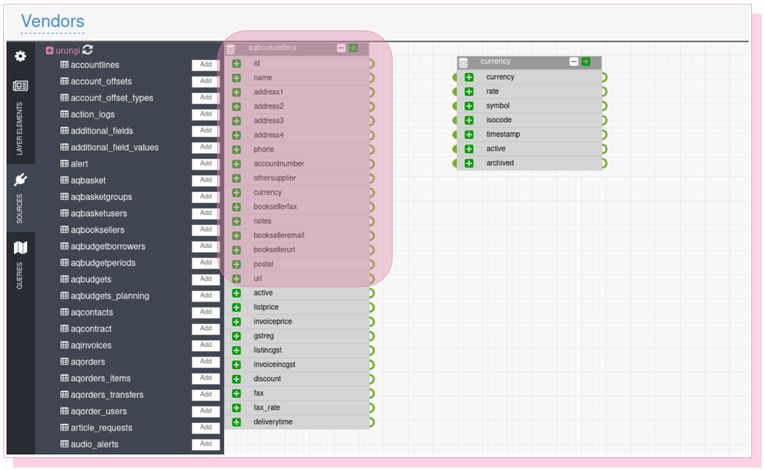
The next step is to link the tables together.
In our example, the ‘currency’ field of the aqbooksellers table is a SQL constraint of ‘currency.currency’.
Let's drag and drop from the green half circle (on the right) of the aqbooksellers table to the green half disk (on the left) of the currency table:
You can specify the nature of the join by clicking on the link line.
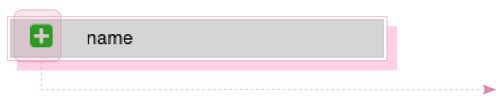
We can now start putting fields in our layer. This is done by clicking on the white plus green (+) to the left of the field concerned.
Let's activate the name of the supplier:
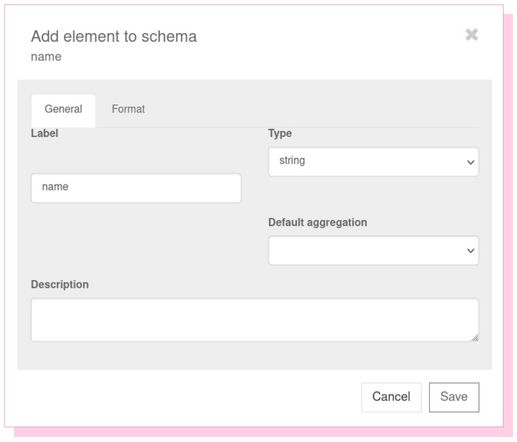
The ‘Label’ will be the title presented to the user.
The ‘Type’ allows Urungi to know which functionalities are available (a numeric type will allow to make mathematical calculations, a date type to enter a calendar, etc.).
The default aggregation allows you to select a function which will be associated with the default field:
- raw: no aggregation
- count: count the number of occurrences of the value
- sum: add the values of the field
- avg: the average of the field values
- max: the largest value of the field
- min: the smallest value of the field.
As the layer is created, the different fields appear on the right (‘Layer elements’ tab).
Warning: it is important to sort the fields in the folders as you add them because then you won't know which table a field belongs to; there are fields in different tables that have the same name.
¶ 3.2 SORT THE ELEMENTS OF THE LAYER
Urungi allows the creation of folders within a layer, allowing the organization of different elements into logical blocks. The user will be able to find the information more easily.
The creation of a folder is done simply by clicking on the ‘New Folder’ button:
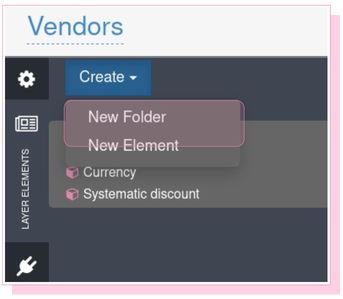
The element, called by default ‘my folder’ is automatically created at the bottom of the layer elements. You can change its name and click on the small diskette to validate the change:

You can then move the folder with the mouse to the level you want.
To integrate items into the folder, simply drag and drop them.
¶ 3.2.1 Calculated elements
Urungi allows you to define calculated elements. To do so, click on ‘New element’ and enter the formula to be used for this calculated element.
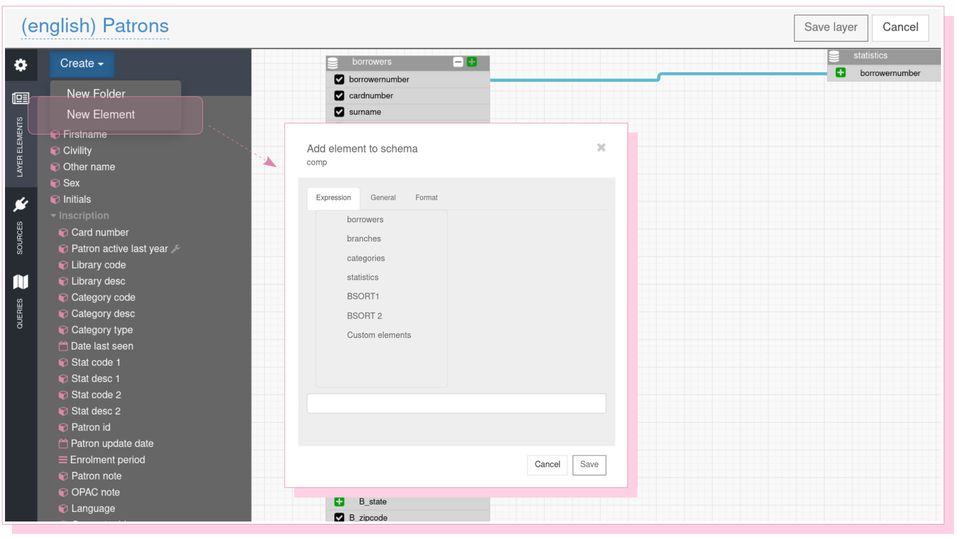
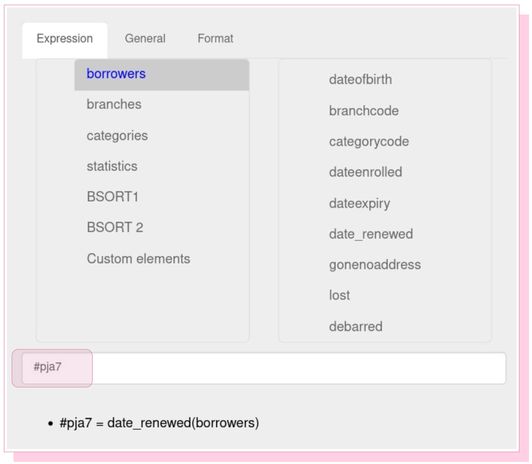
In the ‘Expression’ tab, select a table in the database and then a field in this table. An alias beginning with # will be displayed at the bottom.
Example: alias ‘#pja7’ following the selection of the ‘date_renewed’ field of the ‘borrowers’ table
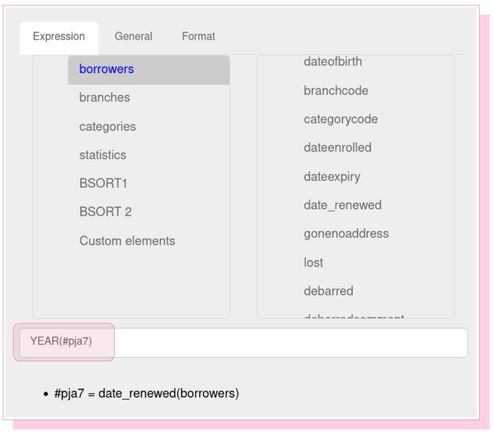
Then you can add a function like :
- ‘YEAR’ to extract only the year if the selected field is a date
- ‘SUBSTR’ to extract characters from a string if the selected field is text
- etc.
Example : retrieve the year of the field ‘date_renewed’
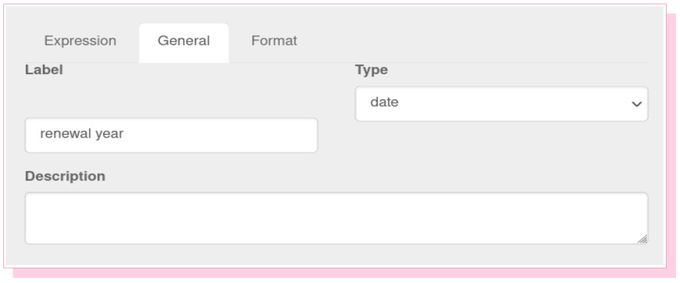
In the 'General' tab, we indicate the title of the new element and the type of the selection field:
- string: text type
- number: numeric type
- date: date type
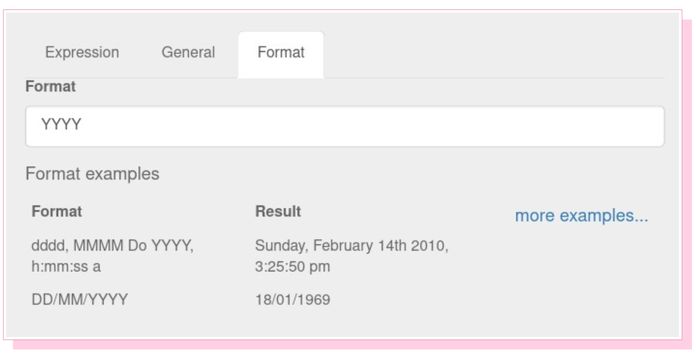
The ‘Format’ tab concerns date type fields: it allows to choose the display format of the ‘Number’ and ‘Date’ fields.
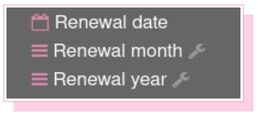
After saving the new element, the calculated fields can be recognized by the small tool on the right ( ).
).
¶ 3.2.2 Duplicate a layer
Layers installed by BibLibre are associated with Urungi updates. Therefore, if you modify an initial layer you risk losing your modifications on this layer when updates are launched.
This is why it is advisable to create your own layers by cloning those created by BibLibre and use them for your future reports.
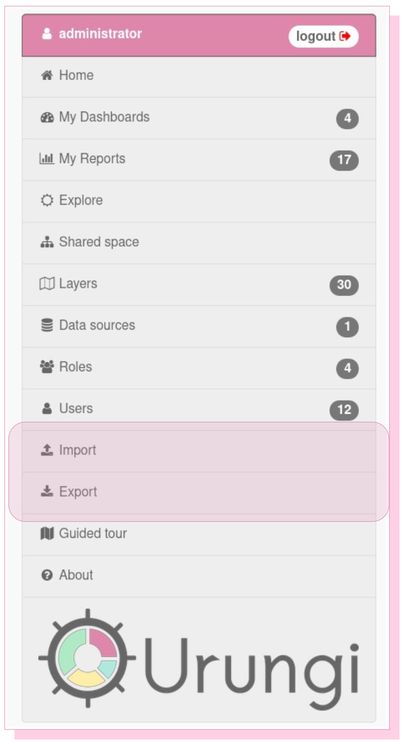
You can duplicate existing layers by using the ‘Export’ and ‘Import’ functions.
The export will create a JSON file that you will have to modify with a text editor like ‘Notepad’. You will have to change the title of the claque and its identifier.
The identifier is a sequence of numbers and hexadecimal letters. You will have to replace two letters and two numbers for example to create a new identifier.
Be careful, this sequence is hexadecimal, you must only use the letters A, B, C, D, E, F.
Example: export the '(english) Acquisitions' layer and rename the json file, named 'export' by default.

From the text editor, search for the name of the exported file (Ctrl+F => '(english) Acquisitions') then do the following:
- in front of the field 'name' put the name of the new file (example 'My acquisitions')

- in the field '_id' replace two numbers and two letters to assign a new id

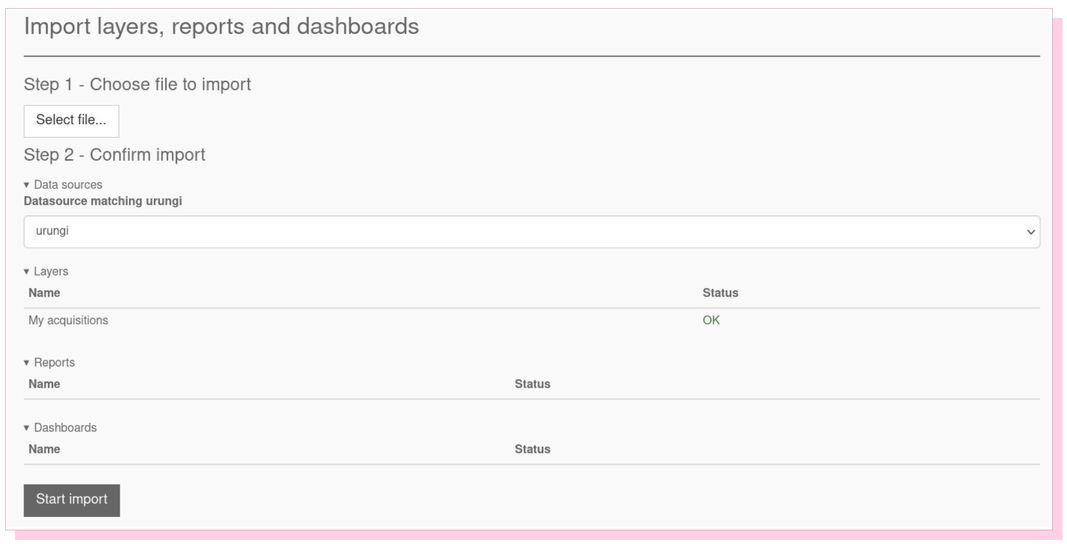
Finally, it remains to import the json file corresponding to the new layer.
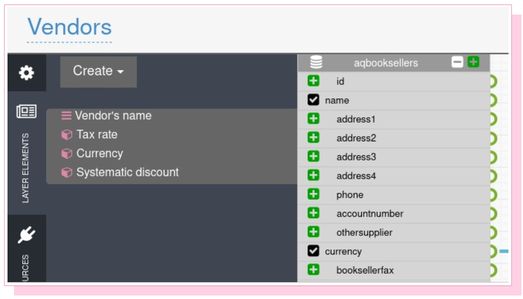
¶ 3.2.3 Conclusion
The finished layer should look something like this:
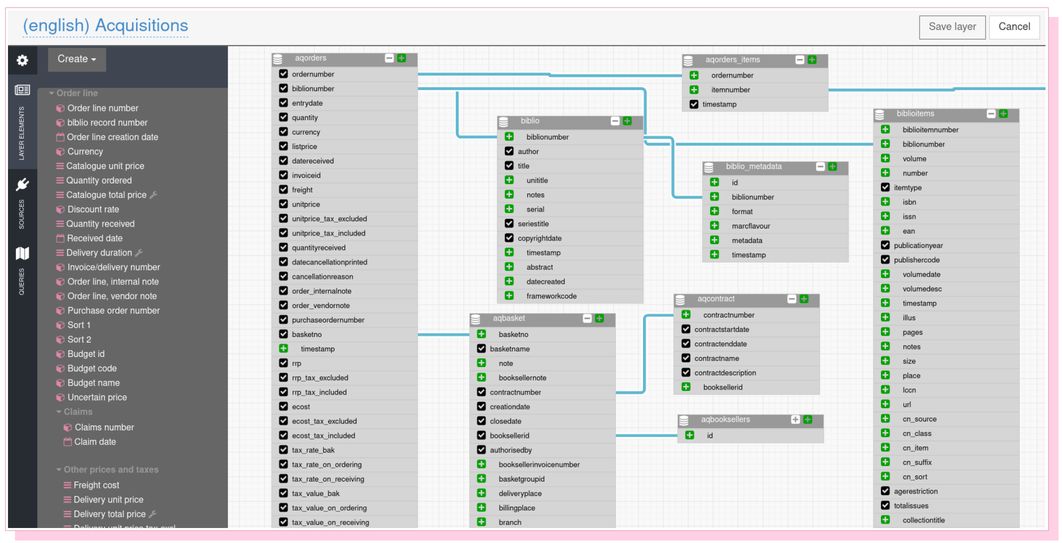
Some additional tips:
- the small (+) on the right of each table allows to activate in one click all the fields of the table in the layer.
- the small (-) on the right of each table allows you to collapse the table and display only the fields that are linked to another table. This is purely cosmetic and has no effect on the layer itself.
- if you need to retrieve very particular data, systematically pre-calculated for example, or with a specific constraint, you can add, in addition to the database tables, one or more SQL queries which will be transformed into a ‘pseudo-table’ in your layer.
It will be frequent to add SQL reports in your layers in order to be able to retrieve the labels of your authorized Koha values.
Example: the query below allows to retrieve the codes and labels of the VA named 'CODE_VA':
SELECT authorised_value, lib FROM authorised_values WHERE category='CODE_VA'